Have Questions? Call Now
512-777-0154
More people are turning to home gardening. Not just to save a bit at the store, but to know where their food comes from. And there’s something satisfying about pulling a fresh tomato from a plant you grew yourself.
But starting a garden from scratch can feel overwhelming. Where do you even begin?
That’s where raised garden beds come in. They’re simple. Manageable. And ideal for beginners who don’t want to dig up half the backyard.
Raised garden beds give you better control over the soil. They’re easier on your back. And they help cut down on weeds and drainage issues. You can grow herbs, leafy greens, root veggies, whatever fits your space and your appetite.
But how do I make a raised garden bed at home? Here's everything you'll need to know and do.
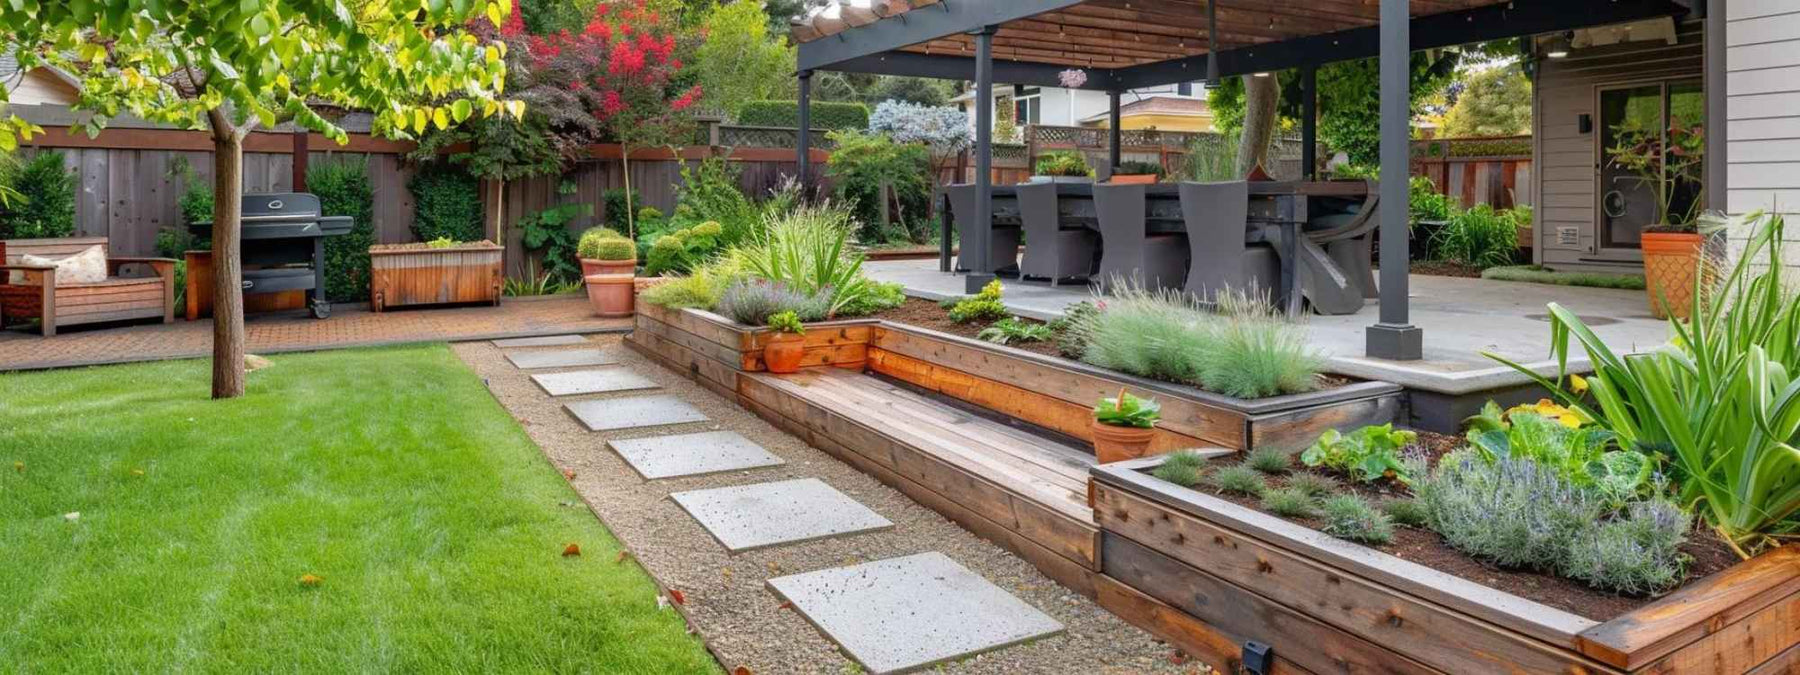
Location matters more than most people think.
Put your raised garden beds in the wrong spot, and you’ll spend months battling poor growth, soggy soil, or plants that simply don’t thrive. But choose the right place from the start, and everything from watering to harvesting gets easier.
Vegetables need a lot of sun.
Aim for 6 to 8 hours of direct sunlight per day. South-facing spots usually perform best. Morning light is great. Afternoon light is even better.
If your space is a bit shady, don’t worry, some crops can handle it. Leafy greens like spinach, lettuce, and kale are a little more flexible. But fruiting plants like tomatoes, peppers, and cucumbers are sun-hungry.
Spend a day watching where the sun falls. You’ll get a good sense of your strongest zones.
Rain is good. Swampy soil, not so much.
If your yard turns into a puddle after a storm, avoid that area. Raised kitchen garden beds like Outdoor Living Today 4×1.5 Urban Raised Garden Bed drain better than ground-level soil, but they’re not magic.
You want a spot that dries out within a few hours after it rains. Check for compacted soil, too. If the ground is as hard as a rock, it could mess with drainage.
Flat, level ground is best. Not just for building but for watering and walking around it. Slopes create uneven water flow. And over time, that can mess with plant growth or even warp the frame of your bed.
Also, think about access. You’ll be out there often, watering, pruning, picking. So choose a spot that’s easy to get to.
If you’re growing herbs or salad greens, keep your Outdoor Living Today 6×3 Urban Raised Garden Bed close to the kitchen. You’re more likely to use them if you don’t have to trek across the yard every time you cook.
An Outdoor Living Today 8×12 Raised Garden Bed is one of the simplest ways to grow your food without going full homestead. But a few key decisions will save you time and frustration later.
Most people go with wood. It’s affordable, easy to work with, and blends into the yard. Pine is cheap, but it breaks down faster, usually in 3 to 5 years. Cedar costs more but lasts longer. And since it’s naturally rot-resistant, it doesn’t need chemical treatments.
Avoid pressure-treated wood if you’re growing food. Some versions contain chemicals that can leach into the soil. Not ideal next to your carrots.

Metal kitchen garden beds are another option. They last longer and don’t rot, but they heat up fast in the sun. That can stress your plants in hotter climates.
Plastic composites are also out there. They’re weatherproof and low-maintenance, but more expensive upfront. A good choice if you’re in it for the long haul.
You don’t need a drip irrigation system. Or a built-in trellis. Or raised bed “kits” with 18 different pieces. It’s tempting to go all in at the start, but most of that stuff just adds cost and complexity.
A basic wooden frame, a few tools, and decent soil are more than enough. You can always upgrade later if you want.
For now, just focus on keeping it simple. The plants won’t know the difference.
Let’s be honest, building something from scratch can feel a bit intimidating. But this? This is just a box. A very useful box that happens to grow food.
No complex tools. No complicated math. Just a few steps, some basic materials, and a bit of dirt. Here’s how to set it up without overthinking it.

Start by choosing the size.
For most beginners, 4 feet by 8 feet is ideal. Big enough to grow a variety of plants but not so big that it gets overwhelming.
Keep the width to 4 feet or less. That way, you can reach the center from either side without stepping into the bed, which compacts the soil and stresses the plants.
Use a tape measure and mark your corners with stakes or chalk. Double-check the angles before you start building.
If you’re using a kit, it should come with pre-cut boards and screws. If you’re starting from scratch, cut your boards to size, two long sides, two short ones.
Pre-drill your holes. It makes the screws go in smoother and helps prevent the wood from splitting. Reinforce the corners with metal brackets if you want extra stability. Especially helpful if your wood is heavy or the ground isn’t perfectly level.
Set the frame in place and make sure it’s sitting flat.
To block weeds from creeping in underneath, line the bottom with cardboard or a few layers of newspaper. It breaks down over time, but gives you a good head start.
If you’ve got burrowing animals in your area, add a layer of hardware cloth, basically wire mesh, to the bottom before you fill it. Keeps them out without harming anything.
Skip plastic liners. They mess with drainage and don’t do much in the long run.
That last bit helps with drainage and keeps the soil fluffy.

If you don’t want to mix your own, you can buy raised bed soil at most garden centers. Just make sure it’s labeled for vegetables and not too heavy or sandy.
Fill the bed almost to the top, but leave an inch or two so the water doesn’t spill over when you water it.
Raised beds are surprisingly flexible. You can grow almost anything in them. But if you’re just getting started, some crops are easier than others. They don’t take up much space. They grow quickly. And they don’t need a ton of fuss.
Start with leafy greens like lettuce, spinach, or kale. These are low-maintenance and grow well even if your bed doesn’t get full sun all day.
Root vegetables are another good pick. Try carrots, radishes, potatoes, or beets. They do best in loose soil, which raised beds are perfect for.
Add a few herbs while you’re at it. Basil, parsley, and cilantro all do well in containers, and they’re nice to have near the kitchen.
Want something a little more fun? Go with cherry tomatoes, bush beans, or zucchinis. They grow fast, produce a lot, and make your garden feel more “real.”
One thing to keep in mind: don’t overcrowd.
Every plant needs space to spread out. Seed packets usually list how far apart to plant things. Stick to those numbers, or your garden can turn into a mess fast.
Related: Best Plants for Raised Garden Beds

Building the Outdoor Living Today 8×8 Raised Garden Bed is one thing. Keeping your plants alive? That’s where the routine kicks in.
But it doesn’t have to be complicated. A little attention here and there goes a long way. You don’t need to hover, just check in often and make small adjustments as you go. Here’s how to keep your raised bed running smoothly once it’s planted.
Most plants prefer a steady routine. And mornings are best. Water early, so the leaves dry out during the day. That helps prevent mold and mildew.

You don’t need a fancy moisture meter. Just use your finger. Stick it into the soil up to the first knuckle. If it feels dry, it’s time to water. If it still feels damp, give it a little more time.
Water deeply, not just a quick splash. You want the moisture to reach the roots, not just sit on the surface.
During hot spells, you might need to water daily. When it’s cooler, every other day could be enough.
Good soil doesn’t stay good forever. Plants use up nutrients, and watering washes some away over time.
Compost is your best friend here. Add a bit every few weeks to keep things balanced. It’s natural, cheap, and easy to work with.
If you want to go a step further, use an organic fertilizer. Just keep it light. Too much, and you’ll do more harm than good. Think of it as a gentle nudge, not a full-blown energy drink.
Skip the chemical stuff. Your plants don’t need it, and your soil will thank you in the long run.
Even raised beds like Outdoor Living Today 6×3 Raised Garden Bed aren’t immune to pests.
Aphids, caterpillars, and slugs are the usual suspects. You don’t need to panic, just check the leaves once in a while. Especially the undersides. That’s where pests like to hide.
If you spot a problem, start small. A simple spray of water with a bit of dish soap can handle most soft-bodied bugs. Neem oil is another solid option for regular use.
Avoid harsh pesticides. They’ll wipe out the good bugs too, and you want those around.

No one gets it perfect the first time. Raised bed gardening is mostly trial-and-error. Some things will grow better than expected. Others might not grow at all. That’s normal.
You can just try again next season. And every time, you’ll learn a little more.
There’s something satisfying about pulling a carrot from soil you built yourself. Or snipping fresh herbs while dinner’s on the stove. It’s not just about the food, it’s about the process.
If you want to track what’s working, start a simple garden journal. Or take photos. Jot down what you planted, where, and when. Over time, you’ll start spotting patterns and avoiding past mistakes.
And if you ever feel stuck, check out more of our outdoor living guides. There’s always something new to learn, even for the seasoned growers.
The key is to keep going. Even a half-failed garden teaches you something. And honestly, a handful of homegrown tomatoes is a pretty decent return.

