Have Questions? Call Now
512-777-0154
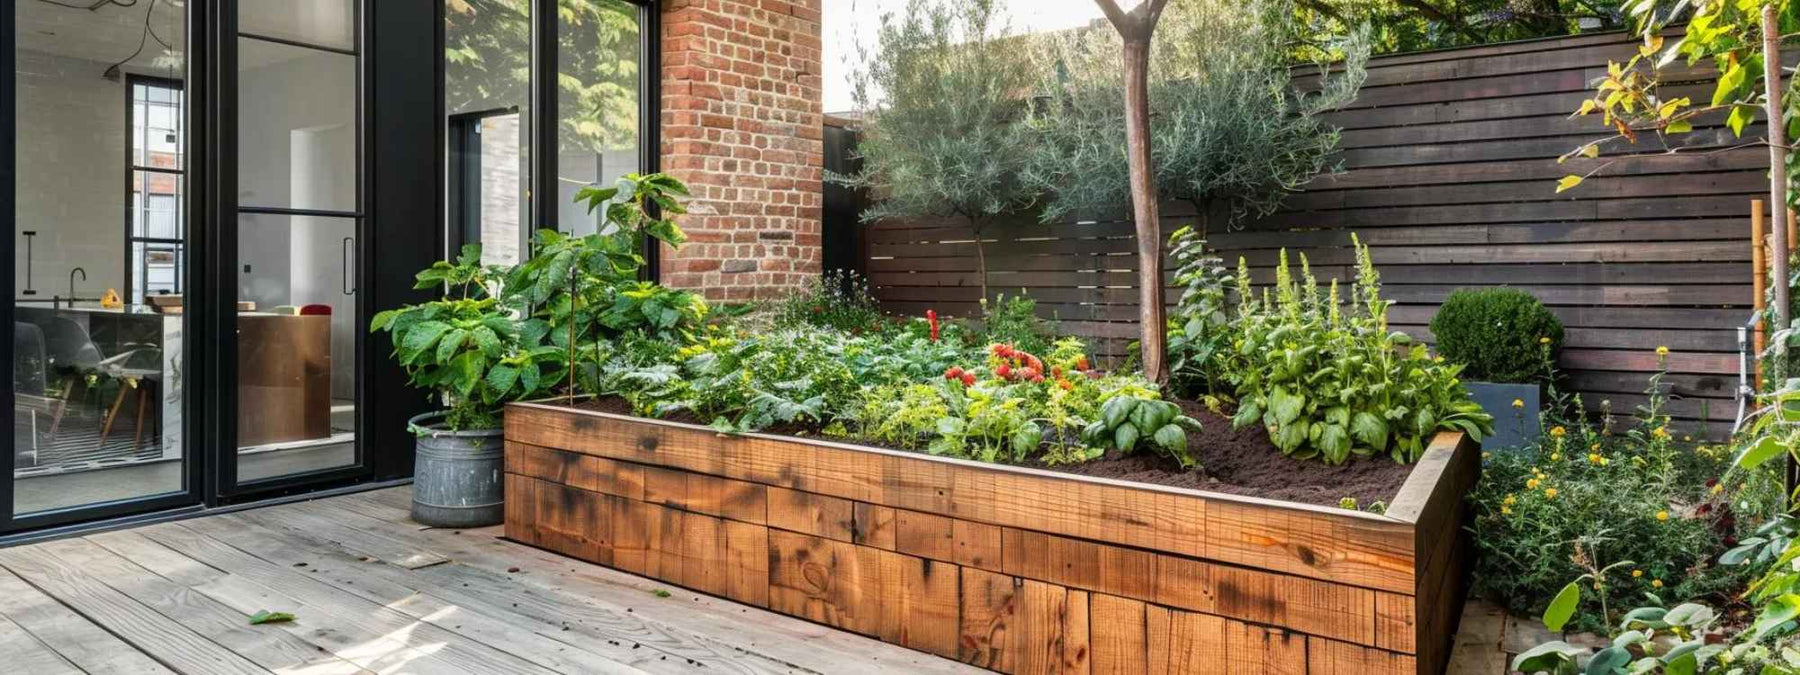
So, you’ve got the raised vegetable garden bed.
Maybe you even built it yourself. Perhaps it arrived in a box with far too many screws. Either way, it’s sitting there empty. And now you’re staring at it, wondering what on earth goes inside.
Do you just dump bags of potting soil, fertilizer, mulch, or organic matter and hope for the best?
Is compost enough?
Do you need some kind of fancy mix you saw on a YouTube video at 1 a.m.?
And let’s be honest, do you have to spend half your paycheck filling a wooden box with dirt?
Filling raised garden beds can feel complicated. But it doesn’t have to be.
Whether you’re growing a vegetable, herb, fruit, or whatever the grocery store keeps running out of, this guide will help you fill your raised garden bed the right way.
What’s going on in the raised garden beds matters more than you think.
Herbs and flowers? They aren’t picky. A shallow patio garden bed filled with lighter soil layers usually does the trick. Basil and mint don’t need much depth. Marigolds are happy almost anywhere.
But if you’ve got tomatoes or carrots in mind, it’s a different story. These plants reach down deep. Tomatoes stretch their roots far below the surface, hunting for nutrients. Carrots? They’ll grow twisted and stubby if the soil’s not deep enough or too dense.

So here’s a quick rule to remember:
The depth of your Outdoor Living Today 6×3 Urban Raised Garden Bed matters too.
Filling a 12-inch garden bed is straightforward. But if you built (or bought) something deeper—like 24 inches—you’ll want to layer carefully. Otherwise, you’re looking at overspending on expensive soil.
Filling a raised garden bed is like following a good recipe. You could toss everything in at once, but it probably won’t turn out well.
The trick is layering.
Each layer has a purpose, so let’s break them down.
Start with the bulky stuff lying around your yard—branches, sticks, logs, twigs. Even those wood chips from last year’s landscaping project.
Why? Because dumping expensive soil straight to the bottom is a waste. It’ll compact and sink over time. Plus, those bulky pieces improve drainage, creating tiny pockets of air that roots love.

Think of it as a natural sponge at the bottom.
Aim for around 4 to 8 inches of this chunky base layer, depending on how deep your Outdoor Living Today 8×16 Raised Garden Bed is.
Next, we add things that are one step from becoming compost. Grass clippings, straw, dried leaves, shredded cardboard—even newspaper works.
These materials slowly break down, feeding your Outdoor Living Today 8×12 Raised Garden Bed with nutrients over months (and even years). They also help reduce costs, because chances are, you’ve already got plenty of this stuff lying around.
One thing to watch out for: Keep this layer loose. Pack it too tightly, and it’ll suffocate your plants’ roots. Around 3 to 6 inches of this layer works nicely.
Now, we add the nutrient powerhouse, compost or well-aged manure. This is what your plants have been waiting for.

Compost from your bin or bags from the store both work. Manure is excellent too, but it has to be well-aged—fresh manure can burn your plants. Think mellow and crumbly, not fresh and smelly.
About 4 to 6 inches of compost or manure sets your plants up for success. If the budget’s tight, even a thin layer on your Outdoor Living Today 6×3 Raised Garden Bed is better than skipping it altogether.
This final layer is critical. It’s where your plants' roots live, so don’t cut corners here.
Go for a blend of quality topsoil and compost—around a 60/40 ratio.
Bagged soil mixes from garden centers are great, or you can mix your own. Just resist grabbing shovels of dirt from your yard—it tends to be too dense and filled with weeds.
This layer should fill the remaining space in your Outdoor Living Today 4×1.5 Urban Raised Garden Bed, typically 6 to 12 inches deep.
Filling a large raised garden bed like the Outdoor Living Today 12×8 Raised Garden Bed can quickly get expensive. Garden soil doesn’t exactly come cheap, especially when you’re staring at 12 or more inches of empty space.
But you don’t have to drain your wallet to fill it. Let’s talk about a few budget-friendly ways to handle it.

Start at the bottom. You probably have plenty of free stuff in your yard right now. Branches, logs, or even leftover firewood all work great. These materials add bulk, improve drainage, and save you money on soil.
Next, check around your neighborhood. Those piles of leaves or grass clippings your neighbors leave at the curb? That’s your goldmine for the next layer. People are usually happy to see them gone. It’s free material that slowly turns into compost—perfect for your raised patio garden bed.
Another smart move is tapping into local compost giveaways. Many towns offer compost cheaply—or even for free—at municipal recycling centers. Just bring your shovel and some bags or buckets.
And remember, you don’t have to fill it all in one weekend.
Gardening is a marathon, not a sprint. Start small, fill just part of the bed, and expand gradually. Before long, your bed will be full, and your bank account will still be intact.
Raised garden beds aren’t picky. You can fill them with all kinds of yard scraps and leftovers. But there are a few things you want to keep out.

First up: meat and dairy. Sure, tossing in food scraps seems eco-friendly. But meat or cheese leftovers are like sending invitations to pests—rats, raccoons, and bugs you never even knew existed. Stick to plant-based kitchen scraps and skip the meatloaf leftovers.
Also off the table? Dog or cat waste. It might seem harmless or even logical—it’s organic, right? Unfortunately, pet waste can carry harmful bacteria and parasites that contaminate your veggies. Keep the garden beds pet-poop-free, no exceptions.
Then there are diseased plants. Got a tomato plant looking sad and spotty? Tempting as it might be, don’t bury it in your garden bed. Those diseases can linger, waiting to infect next season’s plants.
Lastly, skip the pressure-treated wood or chemically treated sawdust. Even if it's tempting because you already have it lying around. Chemicals can leach into your soil and eventually end up in your food. Not great.
Once your raised bed is filled, it’s tempting to jump right in and plant. But hold off for just a minute.
Here’s why:
Freshly filled beds tend to settle. A lot. Especially if you’ve included bulky stuff like branches, leaves, or compost at the bottom. Those materials naturally compress when wet, sinking lower after a few days.
The best move is to give your Outdoor Living Today 8×8 Raised Garden Bed a thorough soak first. Grab your hose and water generously, soaking every corner. Then, let the bed sit for about a week.

After a few days, you’ll probably notice that your vegetable garden bed looks lower than before. Totally normal. Now’s your chance to top off with a bit more soil, making sure your plants won’t sink into awkward pits later.
But what if you’re impatient or just on a tight gardening schedule? You can plant right away. Just know you’ll likely need to add extra soil a month or so down the line as things settle.
Either way is fine. Gardens are forgiving that way.
Just remember, giving your raised bed a little extra settling time at the start makes your life easier later. Your future plants will appreciate the solid footing, and you'll appreciate not having to fix a sunken bed mid-season.
Here’s a secret: your raised bed doesn’t need to be picture-perfect.
Plants aren’t as picky as Instagram might make you think. Give them decent soil, enough water, and some sunshine, and most of them will do just fine. You don’t need an exact science here—just a good enough start.
Maybe your layers aren’t textbook perfect. Maybe you guessed the compost ratios. That’s okay. Nature tends to sort things out on its own. Your tomatoes won't hold grudges over slightly uneven soil.
Gardening is more forgiving than most people realize.
Watch your plants grow. Notice if something looks off—yellow leaves, slow growth—and then adjust as you go. Add some extra compost here, loosen the soil there. Gardening is about tweaking things over time, not nailing it all at once.
So don’t stress too much. After all, it’s just dirt. And it’s perfectly okay to make mistakes along the way.
If you're looking for more straightforward tips on outdoor living or gardening, check out our other guides. There's plenty more where this came from.

