512-777-0154

How to Build a She Shed (DIY, Kits, and Budget-Friendly Plans)
Every woman deserves a corner of peace. A little escape where hobbies, quiet time, or creativity take center stage. That’s where a she shed comes in.
If you’ve ever wondered how to build a she shed, the short answer is simple: plan smart, set a budget, and choose your path, DIY or a ready-to-assemble kit.
The rest of this guide walks you through every step. From choosing materials to adding finishing touches, you’ll soon have your very own backyard hideaway.
Project Planning and Cost: Budgeting for Your Backyard Retreat
Building a she shed starts long before you pick up a hammer. Good planning makes all the difference in how smooth your project goes and how much it costs.
Step 1: Define Your She Shed Vision and Purpose
Start with the fun part: dreaming it up.
Will this be your home office, a reading nook, a creative art space, or even a mini gym? Knowing what you want helps you decide on size, layout, and design.
A 10x12-foot shed is a great place to start. It’s roomy enough for furniture but small enough to stay affordable. Pick a level, dry spot with plenty of light and easy access from your house.
Step 2: Set Your Budget and Choose Your Build Style
Your budget shapes your shed.
If you love hands-on projects, go the DIY route. Expect to spend between $1,500 and $3,000, depending on materials. Lumber, roofing, insulation, and paint are your biggest costs, but doing it yourself saves on labor.
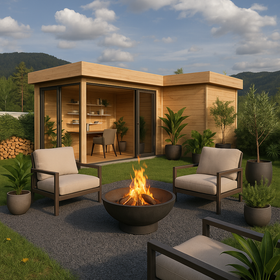
Prefer a simpler path? Try a prefabricated she shed kit like GardenHouse24 USA Paul 70 Garden Room.
If money’s tight, repurpose an old garden shed or playhouse. A little sanding, paint, and new flooring can turn something forgotten into a beautiful retreat.
Step 3: Handle Permits and Prep the Site
Check your local regulations before building. Some towns let you build small sheds without a permit, while others require one for anything permanent. It’s better to check now than face a fine later.
Next, prepare your site. Clear away weeds and debris, make sure the ground is level, and call to have utility lines checked. Give yourself space around the shed for drainage and maintenance.
Building the Structure: Step-by-Step for a Scratch Build or Kit Assembly
Now the fun part begins: construction. Whether you’re building from scratch or assembling a kit, take it one stage at a time.
Step 4: Secure a Solid Foundation
A strong foundation keeps your she shed sturdy and safe.
Choose what fits your budget and skill level:
- A concrete slab for long-term strength.
- A gravel pad for good drainage.
- Skids on concrete blocks for a quick DIY setup.
Make sure the surface is flat and compact. Add skirting around the base to block pests and finish the look.
Step 5: Frame the Walls and Roof
Time to build the bones of your shed.
Use 2x4 lumber for the walls and double-check that everything is square before you secure it. Having an extra pair of hands here is a lifesaver.
Once the walls are up, install the roof trusses and cover them with exterior-grade plywood. For the roofing material, asphalt shingles are reliable and cost-effective, while metal roofing offers modern style and longevity.
Step 6: Weatherproof and Finish the Exterior
Give your she shed a strong, weather-tight shell.
Add doors and windows for ventilation and natural light. Many people love French doors for a bright, open look. Seal around the edges with caulk to prevent leaks.
Finish it off with siding, trim, and paint. Choose colors that make you happy every time you step outside. Soft green, coastal blue, or warm white all work beautifully.
Making It Livable: Insulation, Power, and Interior Finishes
With the frame complete, it’s time to turn your shed into a cozy, functional space.
Step 7: Control the Climate and Comfort
You want your she shed to be usable year-round. Add insulation to the walls, ceiling, and floor using fiberglass or foam boards. This keeps it cool in summer and warm in winter.
For airflow, install ceiling fans or small heating systems. If you want luxury, consider a compact mini-split air conditioner.
Step 8: Add Electricity and Wi-Fi
If your shed needs power, hire a licensed electrician to connect it safely to your home’s system.
For smaller projects, try solar panels or battery-powered lighting. Plan where outlets and lights will go before finishing your walls.
Want to stream music or watch videos? A Wi-Fi extender can easily reach your backyard.
Step 9: Finish the Interior
This is where your shed starts to feel like a real room.
Finish your walls with drywall, beadboard, or wood paneling for a clean look. Choose laminate, vinyl planks, or painted plywood for flooring: durable, easy, and budget-friendly.
Add indoor rugs, curtains, and décor that match your style. Whether it’s a cozy cottage or boho chic, your shed should feel personal and inviting.
Design and Décor: Personalizing Your She Shed Oasis
Now that the heavy lifting is done, let’s make your she shed shine. This is where you turn structure into sanctuary.
Step 10: Decorate on a Budget
Decorating doesn’t need to drain your wallet.
Check out thrift stores, yard sales, or Facebook Marketplace for hidden gems. Paint or reupholster old furniture to give it new life. Add string lights, plants, and artwork for personality.
The best designs tell your story, not your spending habits.
Step 11: Maximize Storage and Functionality
Even a small shed can stay organized.
Use shelves, pegboards, and hooks to store supplies and free up floor space. Try multi-purpose furniture like fold-down desks or benches with hidden compartments. The goal is comfort without clutter.
Step 12: Create Exterior Charm
Don’t stop at the door.
Line your path with stepping stones or solar lights for a welcoming touch. Surround the shed with potted plants or flower beds.
If space allows, build a small porch or deck. It’s the perfect spot to unwind with coffee, tea, or a good book.
Stepping Into Your Finished She Shed
And there it is, your complete guide on how to build a she shed from the ground up.
Whether you crafted it yourself, built from a kit, or revamped an old structure, your she shed is more than a backyard addition. It’s your sanctuary, your creative space, your place to breathe.
Step inside, look around, and take pride in what you’ve built. Your own little corner of calm now exists, and you made it happen.


